
Ollama and the Laptop
A story about installing Ollama and a Large Language Model on Windows WSL2 with VSCode as the user interface.

There are a dozen laptops in my house - some are mine, some are not, and many are deprecated (used only to store photo archives of my kids). One of my sons, who works remotely from here, seems to have many laptops I don’t know too well, so maybe it’s a baker’s dozen and some?
Today, one of my laptops and I went to meet the Ollama. Our journey’s end was to query the Llama2 Open Source Large Language Model and exchange a “*wink*”(read the banter in Figure 1 below).

This post describes the steps I took to install Ollama on Windows 11 WSL2 and use a Microsoft VSCode interface to interact and run a large language model on the Windows linux subsystem.
Ollama is an open-source tool that allows users to easily set up and run large open-source language models locally, such as Llama or Codellama.
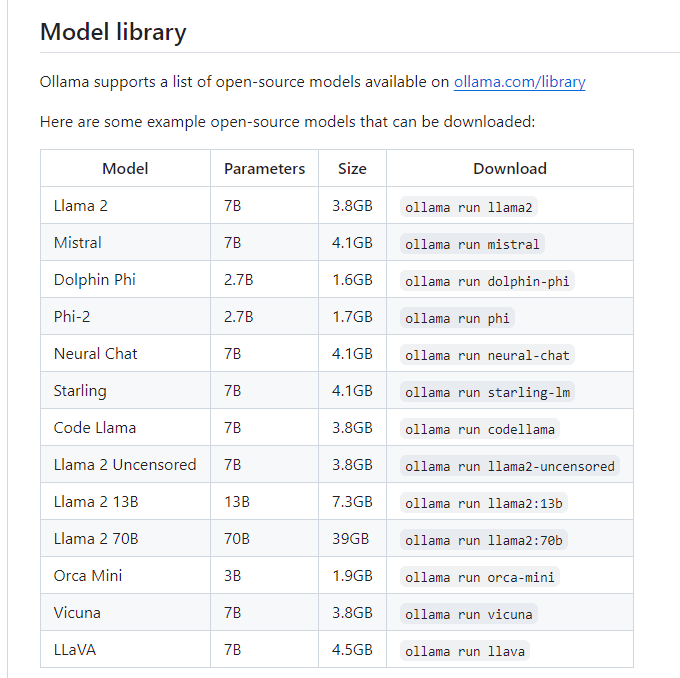
Ollama currently supports the following models. For this experiment, I used Llama2 (7B parameters).
At this time, Ollama needs to be installed on Windows using the Windows Subsystem for Linux, Version 2, or WSL2. The link below describes how the WSL2 works.
Link: What is WSL2 (Windows Subsystem for Linux version 2)?
Under Windows 11, you can enable the WSL2 through the Windows Features panel. Under Windows Features, turn on the Virtual Machine Platform and the Windows Subsystem For Linux features.

Once the WSL2 set-up is complete, bring up a PowerShell terminal and use the following command to view the Linux distributions available to install on your WSL2.
wsl --list --online 
From this list, you can install and switch between different Linux distributions. More information is available from:
I needed to update the Linux kernel before I could install a Linux distribution. Additional information available from:
I chose to install the Ubuntu-22.04 distribution, using the following command:
wsl --install -d Ubuntu-22.04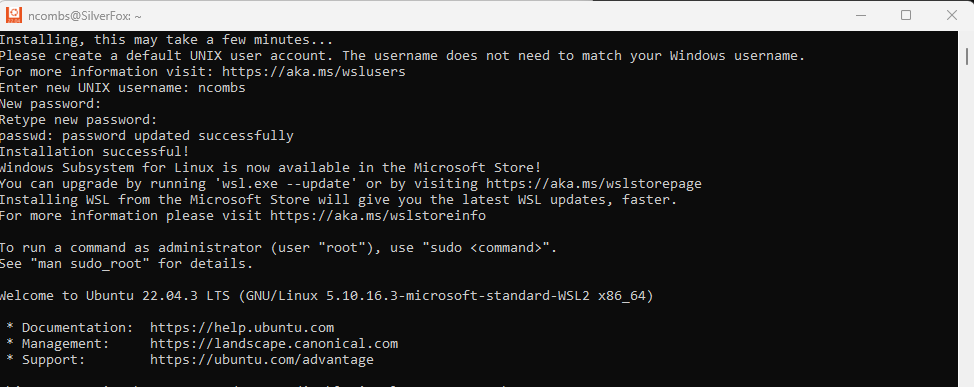
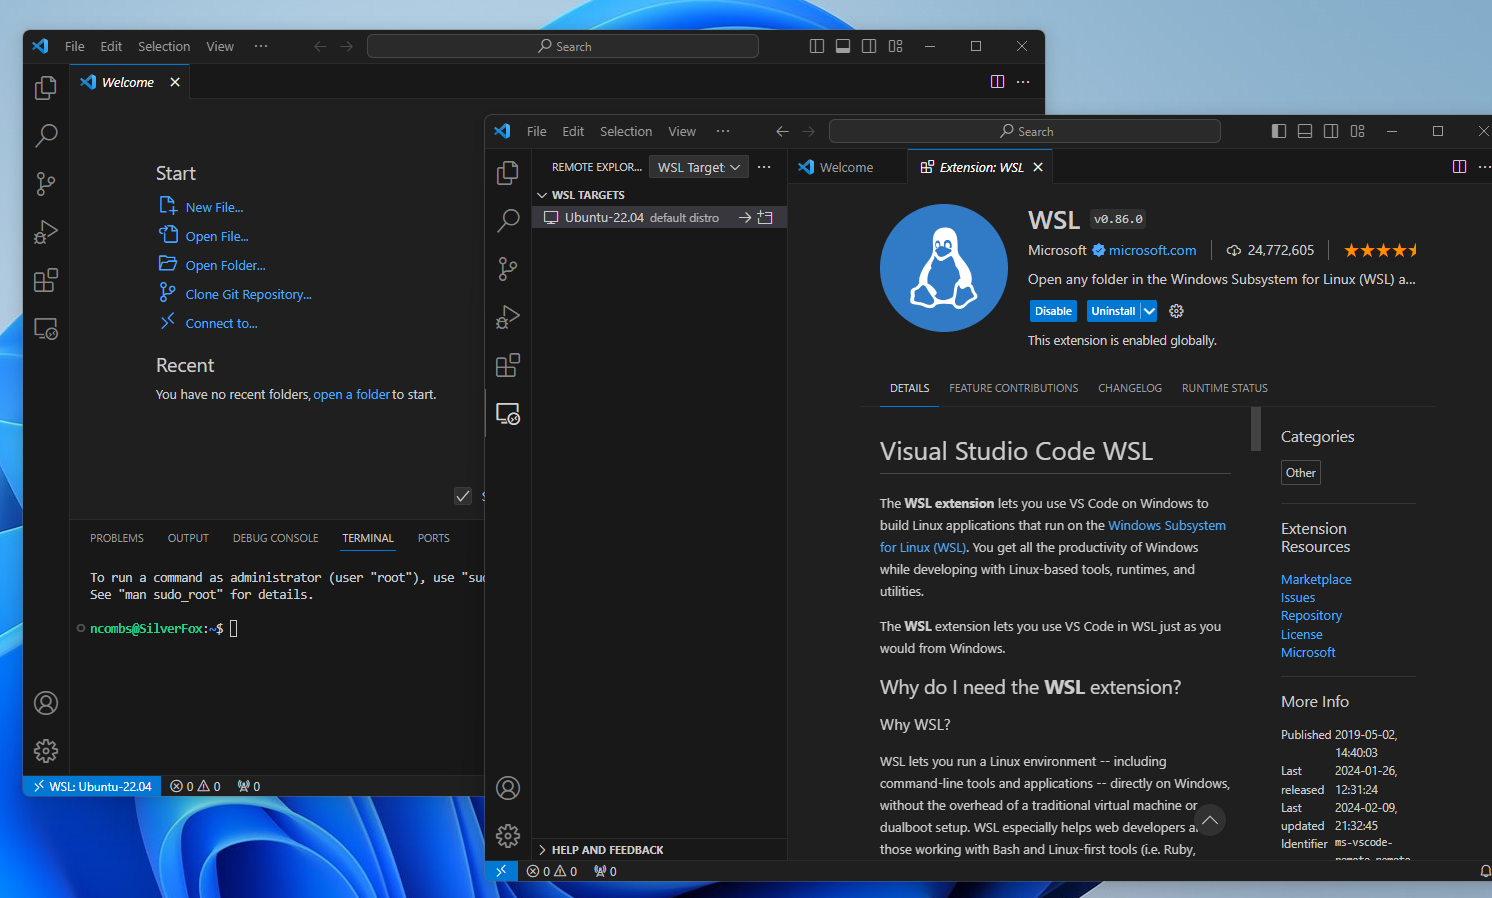
As an alternative to PowerShell, a better interface for interacting with the WSL2 is Microsoft Visual Code. These were the steps I used to install this:
Download and install Microsoft Visual Code.
Install the Visual Code WSL extension.
launch a new instance of VS Code and connect it to WSL2 by opening a WSL terminal.
Navigate to my working folder and type
code .:
For details, consider these links:
Link: Visual Studio Code WSL
We are now ready to install Ollama on the WSL2. Bring up a fresh instance of Microsoft Visual Code. To install Ollama, simply use the following command line from within the VC terminal:
curl -fsSL https://ollama.com/install.sh | sh
The laptop I used did not have an NVIDIA GPU installed. This meant that the LLM would be run using the CPU. This difference impacted my setup.
My next step was to install Docker. It appears that the more recent versions of Ollama work best with the Ollama Docker image. For more information:
I ended up installing Docker on the WSL2 command line using the Apt Repository and installing the Docker Desktop For Windows. In hindsight, there might be an overlap between these two steps.
Thus, I recommend installing Docker Desktop For Windows first (be sure to choose the WSL2 configuration when prompted) and try that first. If that proves insufficient, follow the Apt Repository installation steps for the CL (e.g. on Ubuntu). Consult the following articles:
At this time, Docker Desktop for Windows is a free download for individuals.
Once Docker is installed on the WSL2, be sure to verify that it is working using these commands:
sudo service docker startsudo docker run hello-worldIf there is an error with the above verification command, you may need to reset your Docker group using these commands:
sudo groupadd docker sudo usermod -aG docker $USER newgrp docker Once you are sure that Docker is working in your WSL2, run the following commands to run the Llama2 large language model.
docker run -d -v ollama:/root/.ollama -p 11434:11434 --name ollama ollama/ollamadocker exec -it ollama ollama run llama2In the above “docker exec” command, you can substitute another Ollama model (see Figure 2) for “llama2.”
Voila! It worked for me. I was conversing with Llama2 - see Figure 1.
Additional Links:
For additional details on installing Ollama:
For additional details about running Ollama: